Add-On Manager 
Introduction 
Add-Ons are small applications integrated to Easy Forms for sending data collected by forms to third-party applications or adding specific features to the application.
For this guide we will use the Google Analytics add-on as an example.
Note:
@apprefers to the application root directory.
Install an add-on 
Install an add-on is a very simple process.
- Upload the Add-On folder on your server and host it in
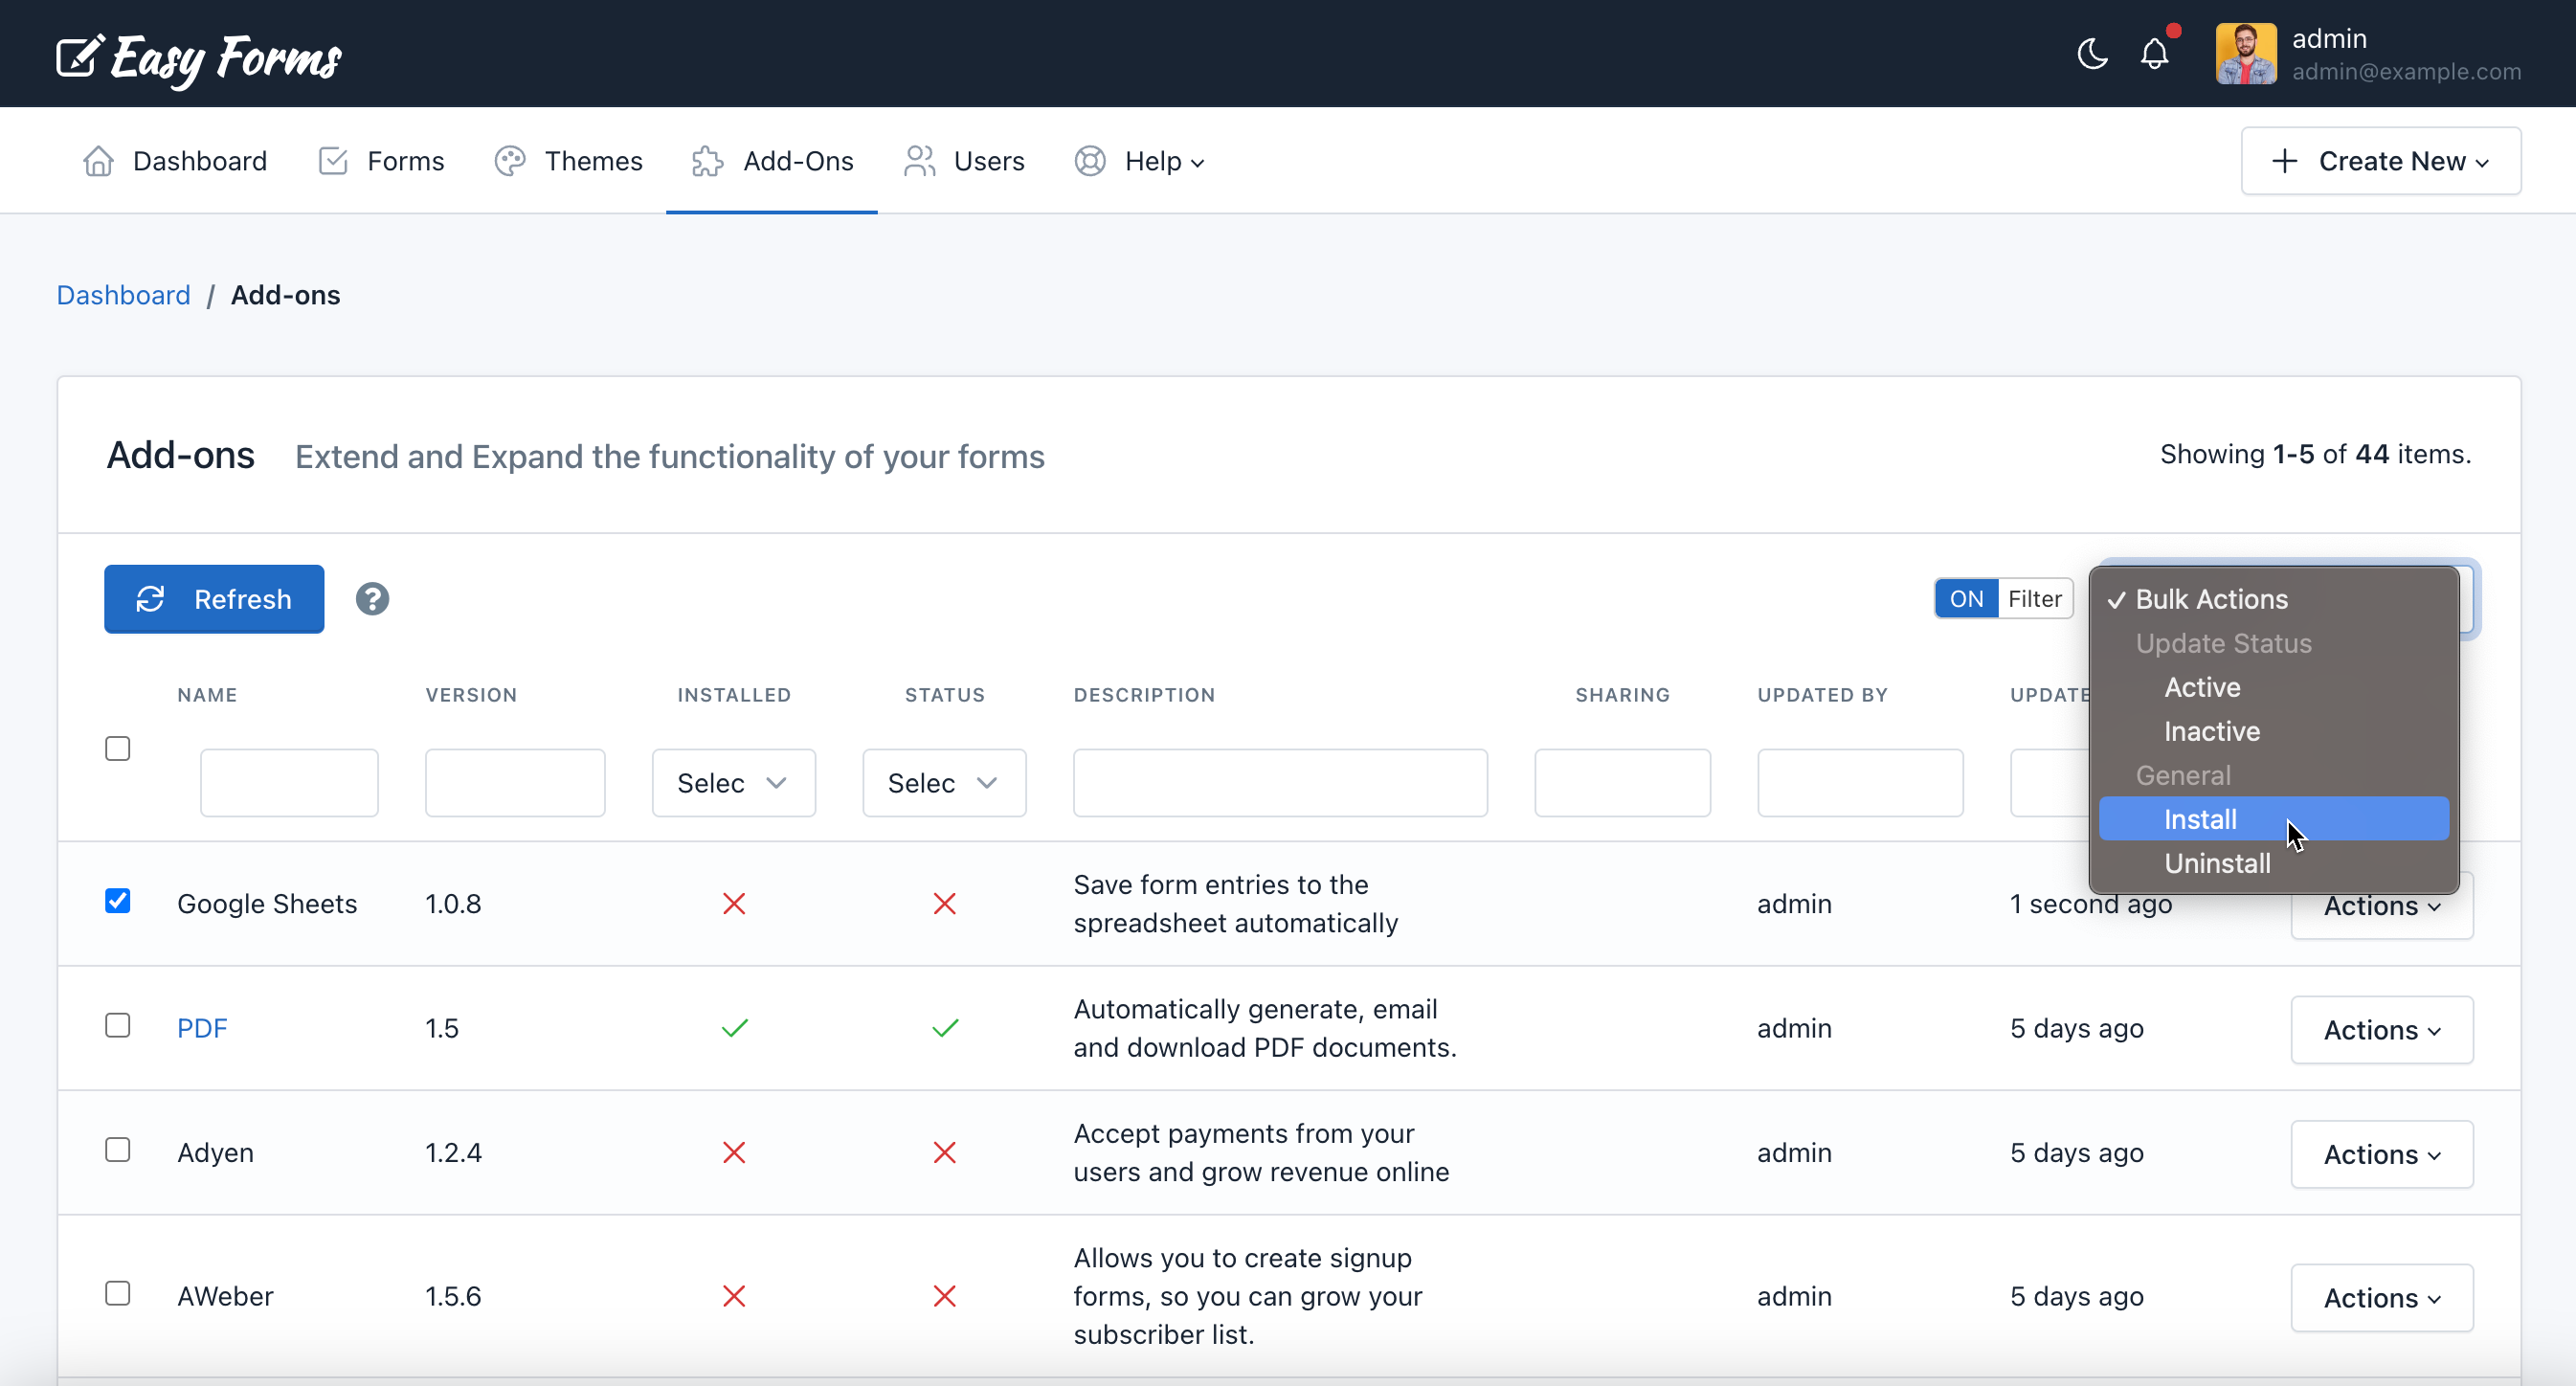
@app/modules/addons/modules. For this example, the folder should be in@app/modules/addons/modules/google_analytics. - Go to the Add-Ons Manager by clicking on Add-Ons of the navigation bar and click the Refresh button.
- In the Add-Ons list you should see the add-on name: Google Analytics, plus its version and brief description.
- Select the checkbox of the add-on to install: Google Analytics and click Bulk Actions and then Install
- Or click Actions > Install.
The Add-Ons manager will reload and Google Analytics Add-On will be installed.
Note: You do not have to download the Google Analytics add-on, is included in the application.

Update an add-on 
The process is the same as the installation.
Disable / Enable an add-on 
When an add-on has been disabled, the add-on stops sending data to third party applications and access to their settings will be disabled.
- To disable an add-on, go to the Add-Ons Manager.
- Select the checkbox of the add-on to disable.
- Click Bulk Actions and then click Disable.
The Add-Ons Manager will reload, and the Add-On will be disabled.
The process to enable an Add-On is virtually the same. You only need to select the action Enable, instead.
Note: When an add-on has been installed and running, you can access it by clicking on its name.
Uninstall an add-on 
When you uninstall an add-on, not only stops transmitting data to third applications and restrict access to their administration pages. It also deletes all the information related and stored by the add-on during its use. This information cannot be recovered.
- To uninstall an add-on, go to the Add-Ons Manager.
- Select the checkbox of the add-on to uninstall and Click Bulk Actions and then Uninstall
- Or click Actions > Uninstall.
Then it will show a popup asking you to confirm your decision to uninstall the add-on.
Configure an add-on 
As administrator, you can access to the add-on settings to update it.
- To configure an add-on, go to the Add-Ons Manager.
- Click Actions and then Settings.
- Make your changes and click Update.
How to allow other users to access an add-on? 
By default, only administrators or add-on managers can access to the add-ons. However, to grant access to the add-ons perform the following steps:
- Go to the Add-Ons Manager.
- Click Actions and then Settings.
- Shared With: This feature allows you to share this add-on with other users. You have three options:
- None: The theme will only be visible by its creator (without considering the administrator who can see all the themes).
- Everyone: The theme will be visible by all users of the application.
- Specific Users and Roles: Allows you to select the users or user roles who will be able to see the add-on. Related permission: Includes the word "Shared" in his name. For example, viewSharedAddons.
Important! Keep in mind that although a user can access to an add-on, he can only create add-on configurations for forms with access. For example, if you share a form with another user, and you want, he will be able to configure your form with an add-on, the user or his user role must have the "configureSharedFormsWithAddons" permission.
- Click Update.