PayPal Add-On 
Introduction 
The PayPal Add-On is a premium one, you can buy it on our landing page. Thank you!
Easy Forms Paypal Add-On allows you integrate Easy Forms with Paypal. With this add-on you can create payment forms by using the new PayPal REST API to perform transactions using HTTP verbs and a RESTful endpoint structure.
Install PayPal Add-On 
The Paypal Add-On installing process is very simple, same to any other Add-On. To install the paypal Add-On follow the documentation to install an Add-On from the Add-On Manager.
Create a Payment Form 
Forms are created through the Form Builder. You just need to drag and drop the fields your form needs. Then, from the paypal Add-On interface you can select the fields that will collect the necessary information to make the payment in Paypal. For example, price, quantity, shipping, etc.
Get data from your PayPal account 
Now that you have a form, let's integrate it with your Paypal account. For this you must perform the following steps:
- Log in https://developer.paypal.com/developer/applications/
- Under “REST API apps”, click the "Create App" button
- Enter the following information:
- App Name: Easy Forms
- Sandbox developer account: Email by default
- Click "Create App"
Next you will see the the account information you'll need to set up the payment forms.
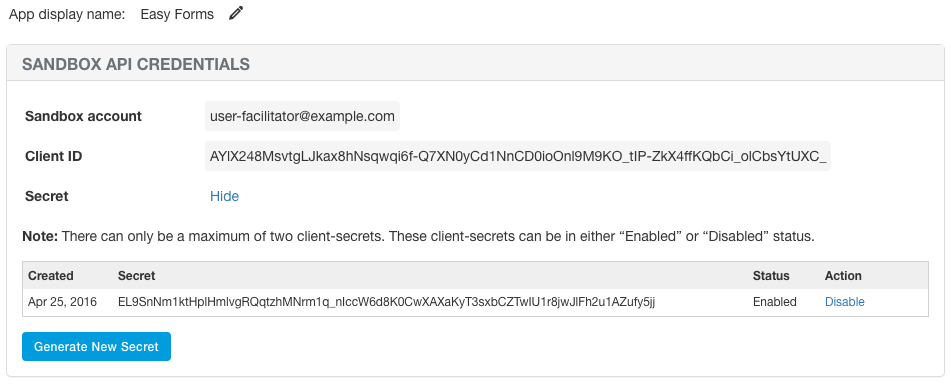
Note: Two buttons will appear at the top of the page: Sandbox and Live. You should use Live when putting your form into production and Sandbox if you are going to make tests.
Set Up Payment Forms with your PayPal account 
To create a PayPal configuration, you must perform the following steps
- Go to the Add-Ons Manager and click on PayPal.
- Click the Set Up a Payment Form button.
- A form used to configure the payment process will appear:
- Form: Required. It is the form you'll integrate with your PayPal account.
- Client ID: Required. Api Credential.
- Client Secret: Required. Api Credential.
- Return URL: Required. Your buyers are redirected to this URL immediately after clicking the Pay button on the Paypal Confirmation page.
- Cancel URL: Required. This link appears on the Paypal page to allow your buyers return to your site without finishing the payment.
- Message: This message is displayed to inform the user that he will be redirected to the PayPal page.
- Mode: This message is displayed to inform the user that he will be redirected to the PayPal page.
- Status: Allows to disable the PayPal configuration.
- Opt-In Condition: Enable a conditional logic to only send invoices when a condition is met.
- Opt-In Field: Select the field that must be present to pass the condition.
- Items: Each item represents a product or service that will be detailed on the PayPal website. It's composed of:
- Description: Describes your product or service.
- Price: It's the form field used to collect the product price.
- Quantity: It is the form field to collect the amount of products. The amount of product is multiplied by the price of each product, to get the sub-total transaction. If you don't select any fields, the used quantity is going to be 1.
- Transaction Settings
- Currency: It's the currency that will be used for your transaction. We recommend using "United States dollar'".
- Shipping: It's the form field to collect the product shipping. This value is added to the subtotal.
- Handling: It's the form field to collect the product handling. This value is added to the subtotal.
- Tax: It's the form field to collect the product tax. This value is added to the subtotal.
- Payment Description: Brief description of the transaction.
- Click Create.